Table of Contents
Define the blog
Nowadays, a lot of people have become a Blogger, even on social media you find in the personal account of some Fashion Blogger – Personal Blogger and other blogging titles.
A blog is a type of website where content is displayed in chronological order (from newest to oldest), and the content displayed is called a Blog Post. A blog can be run by an individual or group who have experience in a specific area.
Create a blog / website
Register in Blogger
You can create a blogger for free from blogger.com and you can register via your own email, if you have a Gmail account = a blogger account, but you must create a blog and modify its link.
Full article: How to create a successful blog and profit from the Internet
Create a blog
Visit Blogger and click on Create your blog as shown in the picture below:

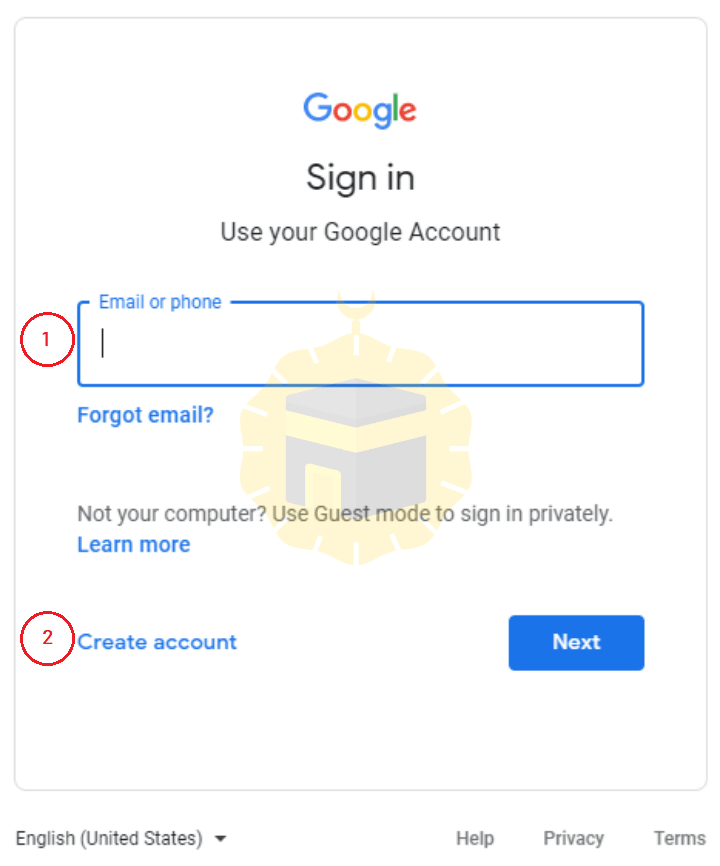
– When you click on create your blog, you will go to the login the page with your email_Google, as shown in the image below:
This page offers you two options:
Log in to the email you already own on Google.
Create a new Gmail account.
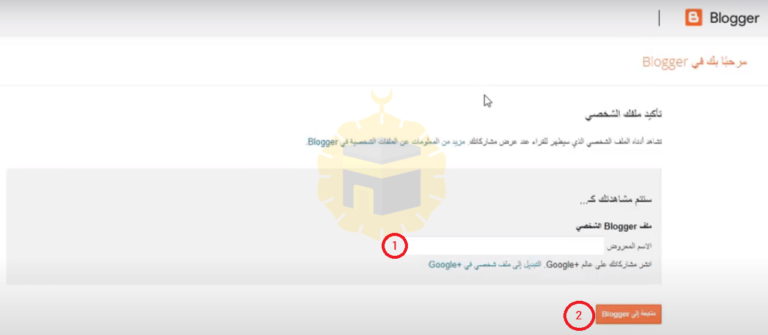
2- Choose a name that appears as a blog writer
Now you will need to add a special name that appears to your blog visitors when you are writing an article or topic.
Choose the name you want and press Continue to Blogger, as shown in the image below:
3- The name of your blog
At the top of the page, Blogger reminds you of its laws regarding cookie rules, its relationship with Google Analytics, and other data Google collects in general and how it uses them.
We strongly recommend that you review these laws and avoid breaking them, but you can skip this step if you like as you can review these laws later.
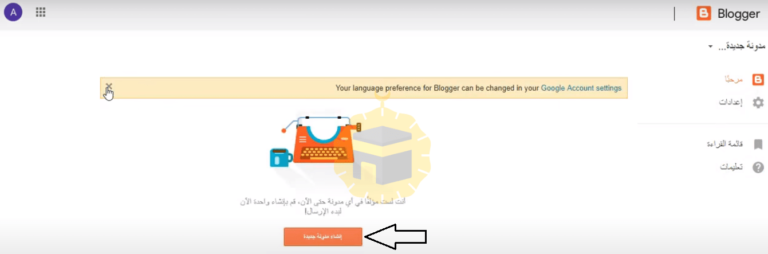
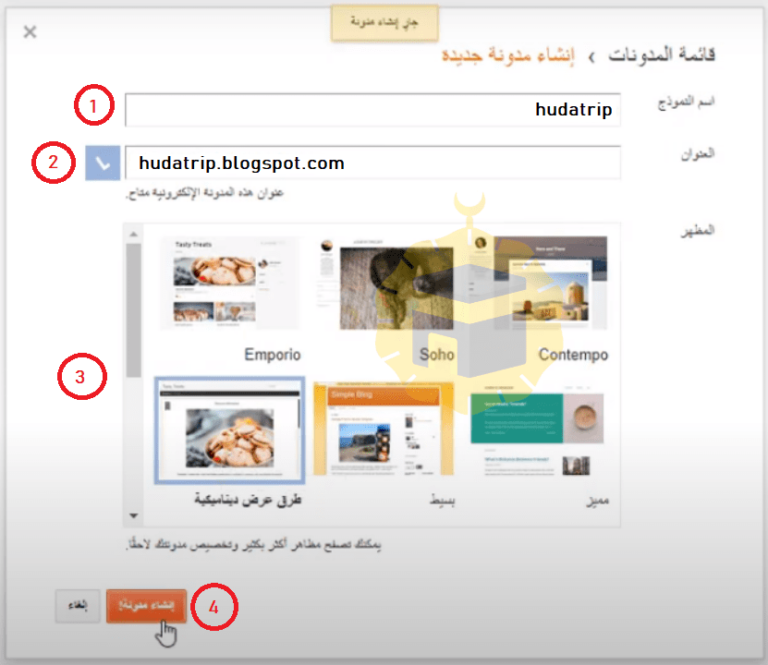
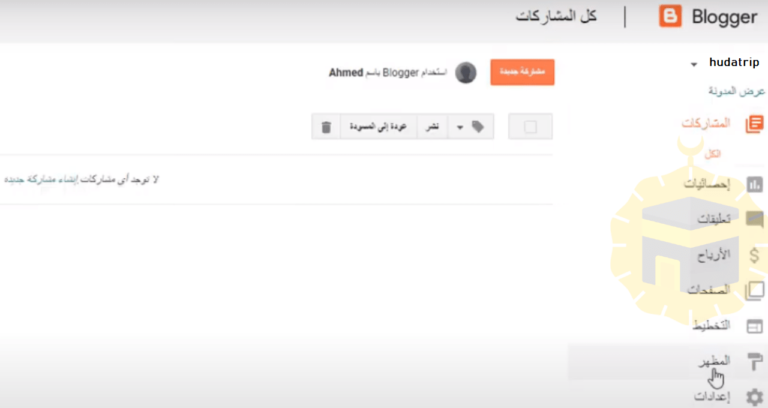
Now let’s start explaining the implementation of the last steps in the blogger creation process by clicking on Create a New Blog, which will take you to the page shown in the image below, in which you will need to choose:
Blog template name.
The name of the blog, which will appear in the blog link.
The appearance of your blog and how the topics it contains will appear.
Make sure you choose your unique name. Also note that you will not be able to pass this step unless you choose a new name that has not been used before.
If the name you entered was already used, you will see an alert through the phrase (The address for this blog is not available).
Congratulations, you’ve finished creating your own blogger blog, the next step is to introduce some sections and how to start writing your first post.
Get a domain
There are 3 modes:
1- Google offers you a free domain name, your_name.blogspot.com
2- Get a free custom domain
First site: freenom
The second site: com.nu The site is in German, so it is preferred to translate it through the browser translation tool
Assuming you want to name your site “hudatrip”, your site will come with this tag: hudatrip.com.nu
3- (the Best choise) Buying a domain with a distinct domain name, and we think this is the best way because the domain will come with features like ssl certificate and others, for more information we recommend you to read this article: How to buy a domain with a price less than $ 2
Click here to buy a domain at a discount
Or you can get a free domain if you buy hosting
Connect a Domain with Blogger
Attention
Almost all connections are the same, despite the different platforms from which you purchased (or got) from the site domain.
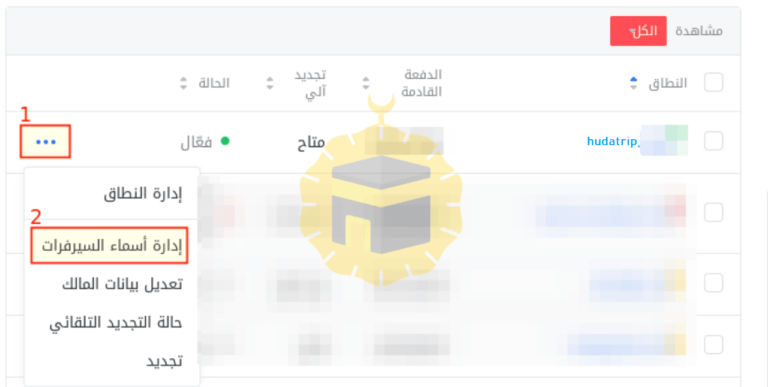
Click on “Settings” then “Basic”.
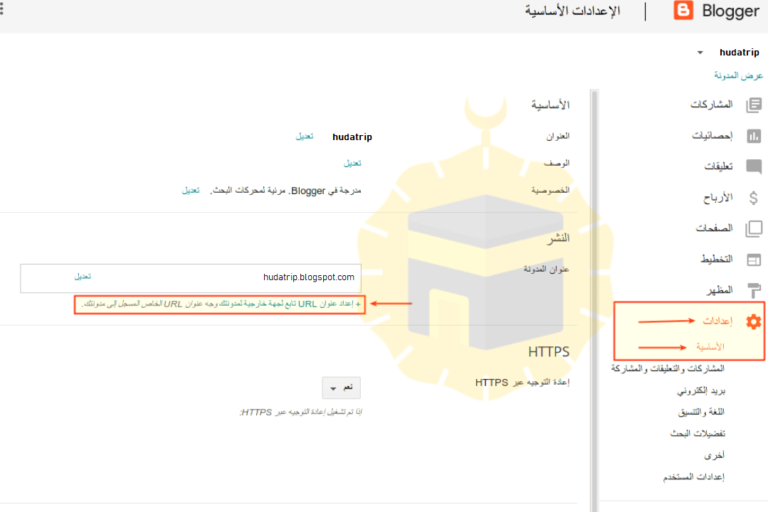
Click on “Set up a third-party URL for your blog” as indicated in the image above.
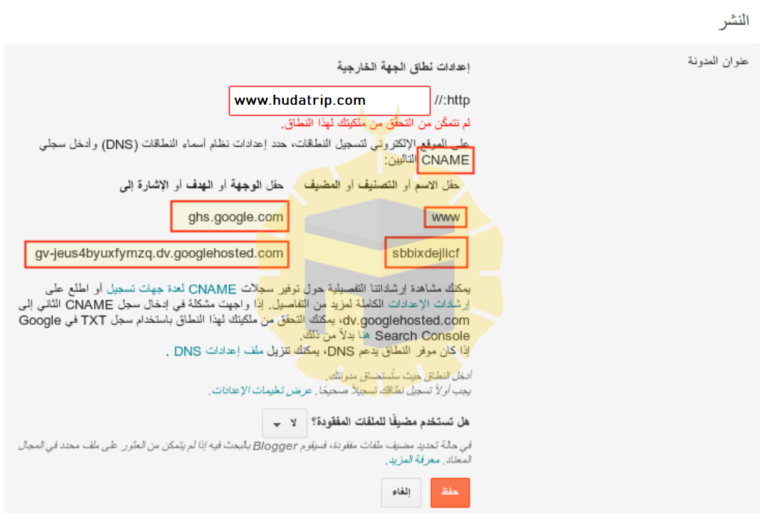
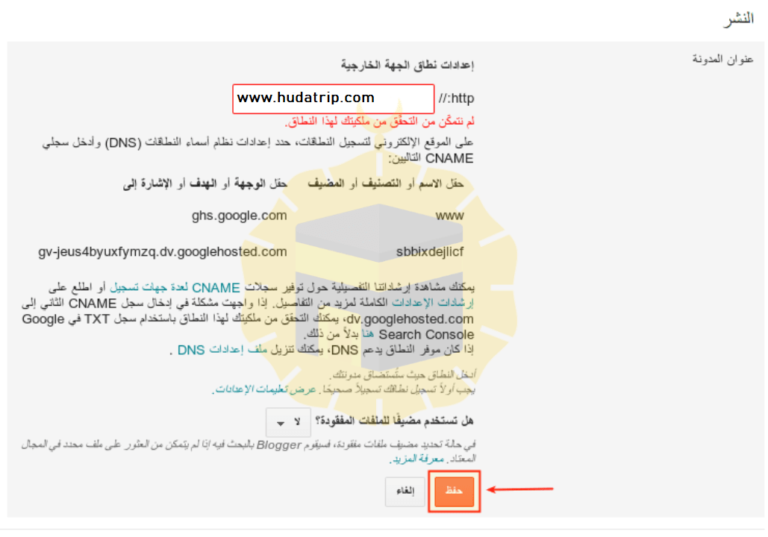
Enter your domain and click “Save”

– You will see a message confirming that you own the domain by adding the CNAME Record in the domain to each of the records (www and another record placed for you), and it will show you the value that you will enter for each record
– To add the records shown, you must log in to your client area to control the domain (https://www.your_name.com/clientarea.php)
– Log in to the domains
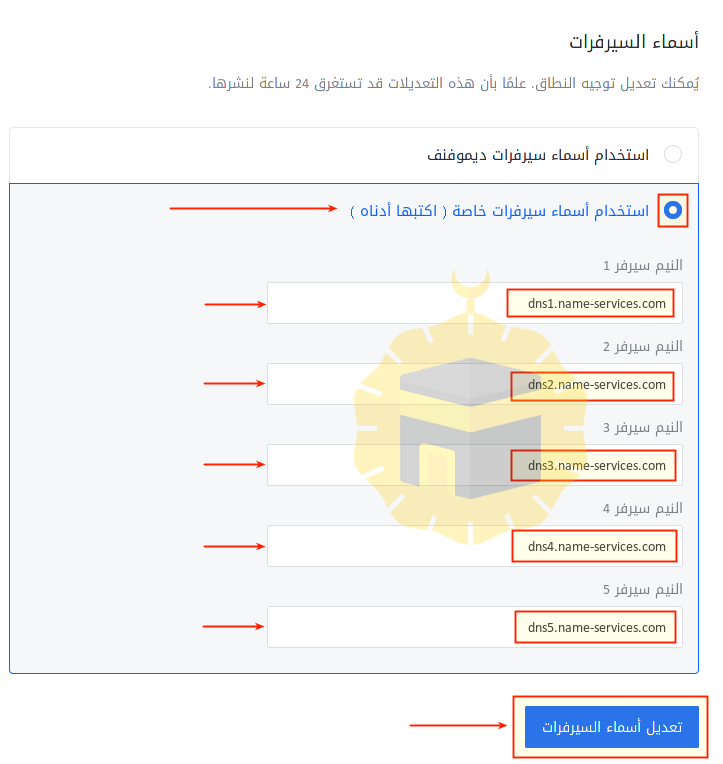
Click on “Manage Server Names”
– Choose “Use special server names (write them below)”, then enter the following server names:
dns1.name-services.com
dns2.name-services.com
dns3.name-services.com
dns4.name-services.com
dns5.name-services.com
Then click on “Modify server names” at the end of the page.
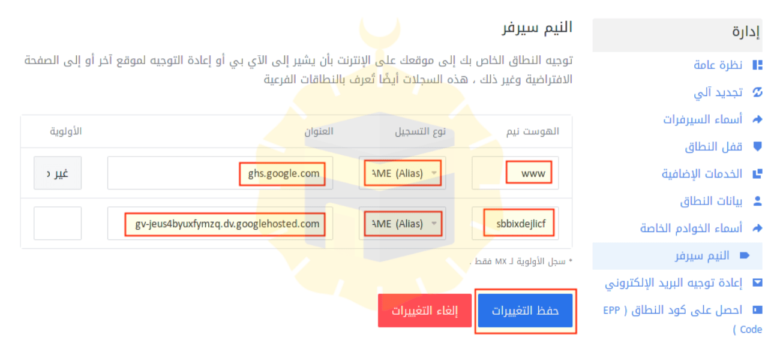
– From the side menu, click on the “Server” and enter the records that appeared to you in the blog in step No. 5, then click on Save Changes.
– Go back to your Blogger blog and click “Save” to verify domain ownership and to run the blog on the domain you linked to.
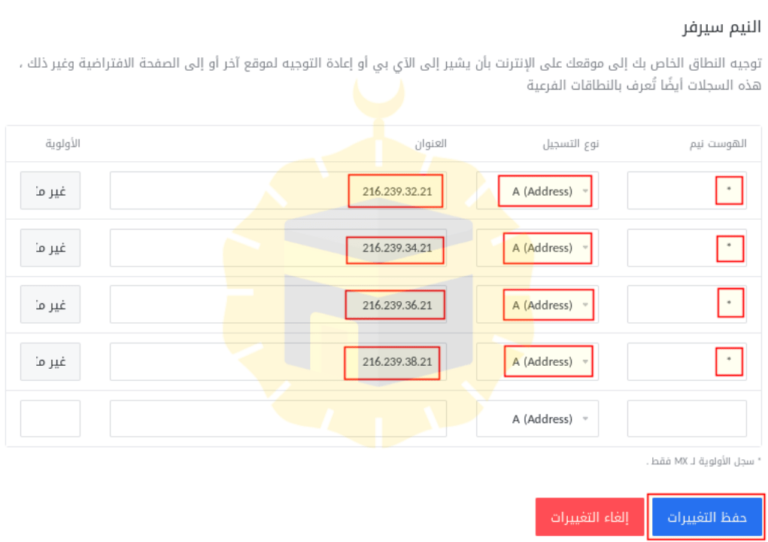
– NB:
With the last step, in addition to the added records, enter A Record for your domain and direct it to the following IPs:
216.239.32.21
216.239.34.21
216.239.36.21
216.239.38.21
Congratulations!! You have created a blog, now you must:
Modify your theme – Either:
- Edit the HTML code yourself.
- Download free themes that some people offer – of course you should check out the theme to ensure it contains no harmful code.
- Buying a Theme (If you are thinking about buying a theme, we feel that it is better to use WordPress because it offers free themes + professional themes, fast, responsive to all devices, you can buy them at a reasonable price.
Full article: How to create a successful blog and profit from the Internet
How to profit from the blog
Ways to profit from the Internet are many and different, but we will try to provide you with the best tools and sites that help you to collect money, God willing, we have explained many ways and in detail so please see the articles and follow us on social media to receive all new.
We recommend that you read the following article: The most powerful ways to earn money
Bring traffic
Multiple ways to bring traffic, including free and paid, so we explained several methods in detail – with a special coupon of $ 300 to make your first ads – so please see the article and follow us on social media to receive all new.
We recommend that you read the following article: The best ways to get traffic


